Picture of Microsoft Website showing one note.

How OneNote Can Streamline Team Collaboration (And Four Tips to Make the Most of This Program)

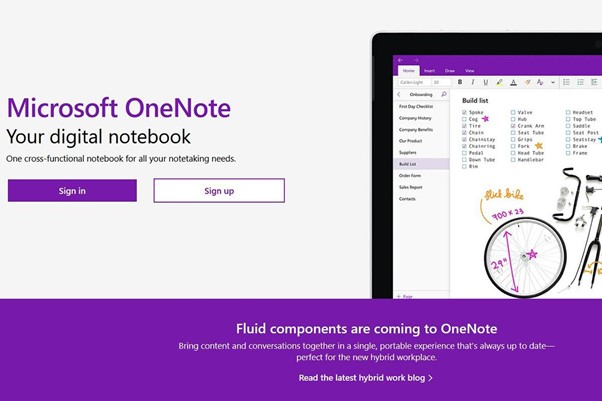
OneNote is a digital note-taking tool that comes with plenty of benefits for users. But what you may not have realized yet is how powerful this app can be for enhancing team collaboration. 

Note-taking.

This is an essential part of day-to-day operations for many business owners, managers, and teams. After all, people can’t rely on their memory alone to recall everything that gets talked about each day. Especially when it concerns important matters.

When it comes to note-taking, traditional methods such as pen and paper are effective but take too long. But modern-day businesses need something that allows them to work faster. That’s why they opt for digital solutions like OneNote.

OneNote is a productivity tool that leverages cloud and Microsoft technologies to make information capturing, storage, and sharing a breeze.

Think of OneNote as a hub for all notes that allows you to organize them in many ways. It even allows pinning multimedia documents next to simple text.

So, if you’re looking for a robust digital note-taking tool, OneNote may be the solution for you.

Keep reading to discover the numerous ways in which this tool can be helpful for you and your business.

Why Should You Rely on OneNote?
Picture of computer code on a glass screen

OneNote is not just a powerful tool for note-taking. It’s also a useful tool that allows you to perform various functions for easy information processing.

Some of its main benefits include:

BENEFIT #1. PROMOTING REAL-TIME COLLABORATION

OneNote is part of Microsoft’s fully-cloud based Office 365 suite. This means OneNote users can share files with other team members or clients in real-time. Multiple people can view and edit their notes simultaneously, allowing for a seamless collaboration anytime.

A great thing about real-time editing is that you can track all changes to the file. You can even restore the previous version of a document in case of an accident.

Businesses that run in multiple locations can benefit from this feature as well. It’s because people located across the country can work on the same project without affecting team collaboration.

Simply put, there’s no need to trade emails and waste time waiting for responses – managers can have an easy time collaborating with their team instantly without ever leaving the office.

BENEFIT #2. SECURING SENSITIVE INFORMATION

Doing business online and sharing sensitive data comes with security risks. This is especially true for notebook software. Fortunately, OneNote comes with a set of security features that protect your data from being exposed to third parties.

For example, you can lock specific sections with passwords while having all your information secured with 3DES encryption at all times. And if your password-protected documents remain inactive for a long time, the software will automatically lock them to prevent data leaks.

BENEFIT #3. INTEGRATION WITH OTHER SOFTWARE

Like other Office 365 suite apps, OneNote has great integration abilities. You can sync your OneNote with Outlook to send email information directly to the app and vice versa.

What’s more, you can integrate this software with non-Microsoft apps as well. Some notable plugins include Zapier, Slack, Trello, Evernote, Dropbox, Salesforce, and many others. And all your essential apps will be synchronized, allowing your team to be more productive each day.

BENEFIT #4. PROJECT MANAGEMENT

OneNote has dozens of uses for general business. However, it’s especially suitable for project management.

Project managers often deal with issues such as team member misunderstandings, communication delays, or project bottlenecks. But thanks to Microsoft’s note-taking tool, many of these issues are quickly alleviated.

Project management can become more straightforward. It’s because OneNote makes it easy for the manager to track each team member’s achievements. They can update timelines, check off completed tasks, or assign new ones with ease.

TAKE ONENOTE TO THE NEXT LEVEL

If you have never used OneNote before, you may be interested to learn about some tips to help you get the most out of the software..

TIP #1. CREATING QUICK NOTES

Quick Note is a great feature that lets you write down a thought when you’re out having lunch or away from the office.

Imagine being in the store and remembering you haven’t responded to an important email. You can take your phone, open the One Note app, and create a Quick Note reminding you of this task.

The next time you open OneNote on your computer, you’ll see the message there.

This feature is similar to Sticky Notes, as it lets you jot down any idea or thought in a matter of seconds. All your notes will be saved in the “Unfiled Notes” section of your “Quick Notes” notebook, a place where all your notes are saved by default.

TIP #2. SEARCHING ACROSS ALL NOTES

Searching for notes becomes more challenging as time passes. If you’re an active user, you can find yourself storing hundreds of notes in a matter of months. But don’t worry, as there are tons of options to organize your notes as well as search for it.

OneNote has a built-in search option to make note finding easier.

All you need to do is click on the magnifying glass or hit “Ctrl” (or “Command” for Mac) + “F” on your keyboard and look for a phrase or word. The software will go over all your typed, handwritten, and even picture notes.

You can further narrow the search by selecting the drop-down arrow and choosing the desired option. You’ll see all matching results highlighted in your notes.

As you find the note you needed, you can close the search by pressing “X” on the right-hand corner.

TIP #3. USING PRE-MADE TEMPLATES

OneNote is designed to have a blank canvas for each new note. And it’s what gives users a whole lot of flexibility. However, you can find this approach to be too basic sometimes. So, why not add some style, structure, and color to the app?

Thankfully, there are tons of pre-made templates to choose from. You can download a template with decorative backgrounds, to-do lists, planners, and more.

Note that you can use the templates only on new OneNote files. The ones that already contain text won’t work since most designs require content to appear in a specific place on the page.

If you need to add a template to your existing note, simply create a new one, then copy the existing text over.

TIP #4. SCANNING DOCUMENTS FROM YOUR SMARTPHONE

Do you need to take notes from a scanned document? That’s not an issue for OneNote. You can use the Microsoft Lens: PDF Scanner App (available for Android and iOS) to take high-quality scans of multiple documents using your phone and upload them to OneNote.

BECOME THE MASTER OF NOTE-TAKING

Digital note-taking tools have helped thousands of workers and managers become more productive. OneNote is one such software that seems to have it all – abundant features, flexibility, and ease of use.

Whether you’re a business owner who wants to boost your team’s performance or a project manager that needs better tracking of the project timeline, OneNote has something in store for everyone.

If you’d like to learn more about how this powerful tool can help you make your business better, feel free to reach out to us. We can have a 10-15-minute chat about this topic.


Article used with permission from The Technology Press.

Desk with computer and keyboard on it

Organizing Your Office Desktop to Improve Productivity – The 7 Tips

Increasing productivity in your business doesn’t just entail optimizing your equipment and sharpening your attention. Decluttering your computer desktop is also essential. 

A clutter-free office is paramount to improving your productivity. Piles of stationery on your desk can cause you to waste a lot of time searching for a critical document. As a result, you’re less likely to meet deadlines.

Clutter can affect you in various indirect ways, too.

It can dramatically reduce your cognitive abilities, impairing your decision-making and relationships with your team members. In addition, it can have an adverse effect on your anxiety, focus, sleep, and eating choices. All of these can reduce your workplace performance.

However, this clutter problem doesn’t just affect your desk or office.

Your computer desktop can also be cluttered. Disorganized folders and a lackluster display impact your productivity as much as physical clutter. To avoid this scenario, you need to declutter your computer as well.

This article will share seven tips on decluttering your computer desktop.


THE 7 TIPS

TIP #1 – DEVELOP A FOLDER SYSTEM WITH FILE NAMING CONVENTIONS

The most important thing you should do to prevent clutter on your computer is set up an intuitive folder system. You can use several categories, such as file type or name, depending on what suits your research or work best.

Regardless of your approach, be sure to choose well-established naming conventions that let you quickly navigate through your documents. The system should also be easy to use for many years to come, so consider your plans when creating it.

You can place these folders in your file share tools (e.g., Google Drive and Dropbox), hard drive, or desktop if you back them up regularly.

With a fully functional structure, you can bypass your desktop by simply downloading new documents to designated folders. Afterward, you can rapidly locate them with the search command on your computer. Type in the name of your folder, and you’ll reach the desired file within seconds.

TIP #2 – MAKE YOUR DESKTOP ATTRACTIVE TO YOU

Besides making your computer desktop fully functional, you should also enhance its appeal. So, select a meaningful or beautiful background. It needs to be enjoyable to look at, motivating you to keep your computer tidy.

To take the aesthetics to the next level, set gridded or lined images as the background to organize files that end up there more easily.

Another great idea is to use a motivational background. Images with powerful messages encourage you to work harder and remain focused. This type of coaching also enables you to organize your desktop and stay on top of clutter.

TIP #3 – CONSIDER SECTIONED DESKTOP WALLPAPER

Sectioned desktop wallpapers are a great way to enhance your desktop organization further. For instance, you can include a section for your vacation or pets.

There are millions of wallpapers online that can help you declutter your desktop. They complement folder naming conventions to improve your workflow.

TIP #4 – CONSOLIDATE YOUR MOST USED APPS/SOFTWARE

Having quick access to your most used programs or software is a must. It allows you to start working immediately without wasting time searching for apps.

To consolidate efficiently, you should first determine which software matters most to you. Your portfolio may comprise two or three apps you use daily or an entire suite of programs that provide the necessary functionality.

Once you’ve assembled your list, you may be able to merge multiple programs with a comprehensive solution. It puts them in one place to streamline your productivity.

The taskbar is an effective alternative, as program icons are often responsible for the bulk of your clutter. Keeping the essential icons in the taskbar makes them quickly accessible since you won’t need to browse.

TIP #5 – DELETE OR RELOCATE UNUSED FILES
Keyboard with a yellow key with an X on it.

After categorizing vital apps, you also need to address unused programs. Here’s a tip: if you can’t recall when you last used certain software, uninstall it. Do the same if you don’t think you’ll need a particular application for an upcoming project.

Since this may be a hard decision, you may want to create a folder for these rarely used apps and files instead. Tuck them away until you figure out if you wish to proceed with the deletion.

For this wait-and-see approach, you can make use of several folders, such as “miscellaneous” or “to be archived.” In doing so, you won’t accidentally uninstall or remove a crucial program.

Now, if you take this approach, make sure to check the folders regularly. Determine which files and apps are no longer needed in your business and delete them to avoid clutter.

To avoid falling behind with your cleaning, set a reminder on your calendar. It can be a monthly or weekly event, depending on your workload.

TIP #6 – CATEGORIZE NEW CONTENT

Dumping new files and programs onto your desktop may be tempting if you’re in a hurry. However, this method is ill-advised because it inhibits your organization.

Try to allocate a few minutes to organize all new apps and files appropriately, according to your naming conventions. A quick way to do so is to use automatic file sorting by date or alphabetically. It doesn’t take long, yet it can significantly reduce clutter on your computer.

TIP #7 – EMPLOY FENCES

Digital fences group files in specific regions of your desktop to make them more visually accessible. This method works much better than burying all your files in one or two folders. Plus, many people consider it more user-friendly than gridded backgrounds.

For example, the Stacks feature automatically categorizes content by type or any other specific feature. It’s available for free on Macs with Mojave.

Likewise, PCs have a similar feature called Fences. It enables you to designate and move fences around the desktop for improved maneuverability. The only downside to this is that it’s not free.

DON’T LET CLUTTER GET OUT OF HAND

Decluttering your computer desktop is one of the best ways to advance your productivity.

Once you’ve organized it appropriately, you’ll be able to find the necessary files and programs effortlessly. You’ll then feel rejuvenated, and your mood may improve dramatically, allowing you to overcome mental obstacles during your workday.

It might take some time to optimize your desktop, but it’ll be well worth it.

You can also assign this job to your IT provider. However, they may not understand your needs and that of your business correctly, and their services might be insufficient.

In that case, let’s have a 10-15-minute chat and see if we can resolve your problem. Give us a call and we’ll do all we can to help you increase office productivity in your business.


Article used with permission from The Technology Press.

Edge Logo

It’s No Internet Explorer! 7 Features of Microsoft Edge That Make the App a Productivity Powerhouse

Many business owners shy away from Microsoft Edge, thinking it’ll slow down their operations. However, the browser has been massively upgraded and can help boost productivity.

Microsoft has made great strides since the introduction of Internet Explorer. The company now offers Microsoft Edge, a refined version that arguably provides the best web experience for business users.

Unlike the old Internet Explorer, this browser now relies on Google’s Chromium engine to provide faster loading, better compatibility, and enhanced support. Plus, Microsoft releases regular updates to tweak various features of the browser.

With Microsoft Edge, you can now surf the internet more privately, optimize performance, enable cross-device support, and enjoy many other neat functions.

Best of all, these features have been introduced conveniently. They don’t clutter the interface and are easy to find. They’re also user-friendly, which means your team won’t have to rely on your IT service provider for help with simple tasks involving the browser.

Overall, Microsoft Edge has come a long way since its release and boasts several features you can use to boost productivity. This article will list the seven main ones.

THE FEATURES
Picture of a mail slot in a door with the words private above it.

FEATURE #1 WIRELESS SHARING

One of the most attractive features of Edge is Share. It allows you to transfer browser content to nearby devices without leaving the website you’re viewing.

The Share feature is simple and clean. It works like social-sharing buttons but contains more customization options and controls.

Wi-Fi sharing might be the most practical option, but you can also choose between other services, such as OneNote and Mail.

FEATURE #2 MULTIPLE PROFILES

Microsoft Edge provides another convenient feature – setting up multiple profiles.

This well-designed function lets you share your browser with other team members without disclosing your preferences or information. Such a feature makes the browser a practical tool for separating your work and personal stuff.

To make this work, you won’t even have to ask your IT service provider to do the task.

When adding a new profile to Edge, you do it by simply linking to a different Microsoft account. This newly-linked account has a unique history, favorites, and other relevant settings compared to other profiles on the same browser.

There’s also the option to switch between connected profiles automatically. To do that, the browser will prompt you to use the correct profile when launching a page.

Users save time and increase productivity as a result.

FEATURE #3 WEBSITE PINNING

Most browsers have the Pin feature to help users access their favorite websites quickly. They need only to launch the program to load the pages automatically.

However, this function can be problematic.

If you close the window with pinned sites before closing the remaining windows, the pinned sites are lost. This can be a massive problem for your workers, especially when working on a critical project. Their productivity suffers since they often need to re-pin sites.

Microsoft Edge solves this issue with the Pin to Taskbar option.

As the name suggests, it lets you pin sites to your computer’s taskbar. Once you open the desired page, click this feature in the ‘More’ menu. So the next time you need to access the website, clicking the icon on the taskbar should do the trick.

FEATURE #4 PRIVACY CONTROL

Tracking Prevention is a Microsoft Edge feature that helps prevent social media, advertisers, and other trackers from tracking your online activity. It can protect your privacy and make your browsing less personalized, which is essential for any professional environment.

This feature consists of three privacy levels:

  • Basic – This level permits most trackers. Therefore, ads and content are personalized based on your team’s activity, but known harmful trackers are blocked.
  • Balanced – The second level blocks trackers from unopened websites, leading to fewer ads and less personalization. Like the first level, this one also blocks known trackers.
  • Strict – The final level promises the most privacy. There will be minimal personalization, with some parts of websites disabled to fend off threatening trackers.

FEATURE #5 READING LIST

Your team often marks articles for later revisiting but end up cluttering their bookmarks. Fortunately, Microsoft Edge has a powerful feature to overcome this obstacle:

The Reading List.

This feature allows you to save articles and synchronize the saved list with other devices. More importantly, it doesn’t mess up the Favourites or Bookmarks tab, allowing your team to get back to them in no time.

If they come across an interesting webpage, they need only strike the Star symbol in the address bar, choose the Reading List and press Add.

There’s also a convenient Reading Mode that helps remove any clutter to further improve workplace efficiency.

FEATURE #6 TAB PREVIEW

You and your team probably perform a lot of research daily. This means you often need to use a bunch of tabs, and the number can quickly get overwhelming. As a result, you get lost in all the clutter, hindering your progress.

Microsoft Edge lets you avoid this scenario through the Tab Preview feature. It shows a preview of any open tab through a panel located at the top of your screen.

Launched after the Creators Update, it can be activated by clicking the chevron icon. Once you locate your tab, tap on your chevron icon to make the panel disappear.

You’ll hardly find a simpler yet more effective tool.

FEATURE #7 MUTE TABS

You may enjoy listening to music to improve your focus. But as you’re invested in your work, a newly opened tab can start playing a high-pitched dialogue, breaking your concentration.

Luckily, you can get back on track by enabling the Mute Tabs feature on Microsoft Edge.

Just find and right-click the annoying tab to reveal the function. Activating it allows you to work without noisy distractions and maintain high productivity.

STICK TO MICROSOFT EDGE, AND YOU WON’T LOOK BACK

One of your primary duties as a business owner is to ensure productivity across the entire team. If your employees underperform, customer satisfaction may plummet, and the competition may grab your clients.

We’ve listed seven key Microsoft Edge features to help you boost productivity, but this browser has a lot more to offer.

And there’s no need to think you’ll face the same issue as Internet Explorer users. This program is a massive upgrade designed to streamline your experience and help your team conduct their duties more efficiently.

If you’re looking for more tips to take your productivity to the next level, give us a call today. We can arrange a 15-minute obligation-free chat to determine how to improve your business.

Article used with permission from The Technology Press.