In this article, I’m going to give you 2 scenarios one you’ll know, and one you might not. But we all know when our company’s internet is down how painful it is. When it happens you start to do something else and discover “Oh yeah, that uses the internet too” business comes to a standstill. We’re all interconnected; without our internet connection, we just can’t function at full speed.
Scenario A – Business as Usual
“This always seems to happen when I need it the most”
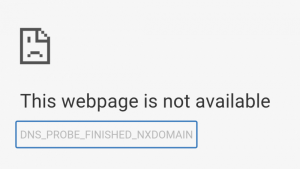
When our internet connection is working we’re doing our work, not really thinking about how dependent we are on that precious connection. Suddenly, the website page you’re looking at turns to …
you don’t immediately think about it until you refresh the page and keep getting the same message. You check with your co-workers and if we’re your technology company you call us and we confirm it. Your company’s internet connection is down.
Contacting Your ISP
You contact your internet service provider and after some rudimentary troubleshooting, they open a service ticket. You are left in limbo about when you’ll be able to get back to work with the internet functioning again.
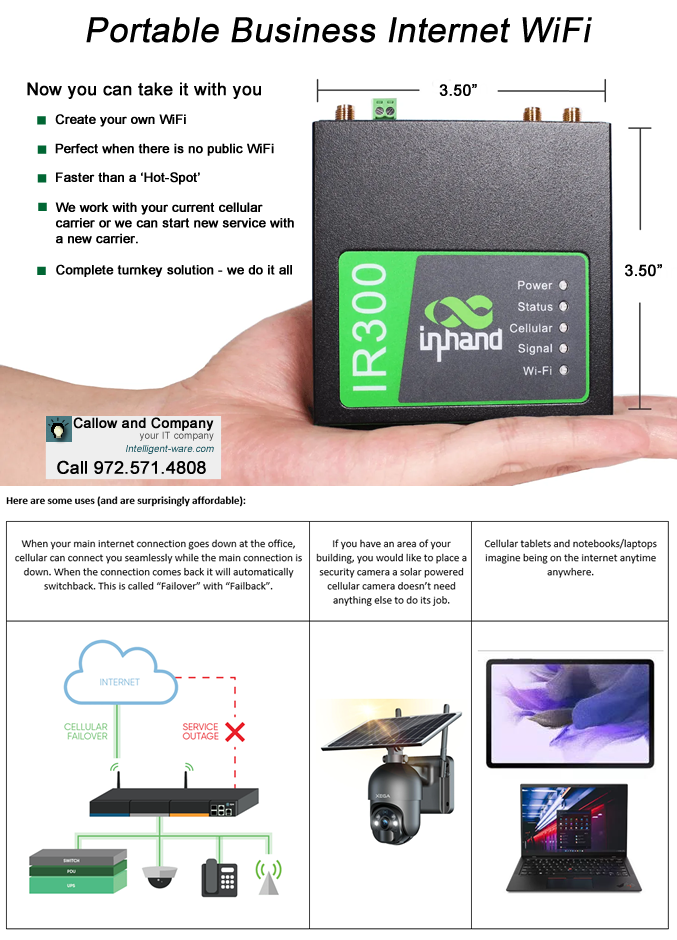
Scenario B – A New Approach
Let’s keep in mind Scenario A, but this time when we get the “webpage is not available” message we refresh our browser, and the webpage loads normally.
“Hey, what just happened?”
Internet Failover is the answer. Whatever connection you have to your regular ISP (cable, fiber, DSL, or even radio tower) having an always ready cellular connection is the answer. We have a relationship with all the top providers (AT&T, Verizon, T-Mobile, and others) and can help you prevent having a sudden outage because of weather, or an ISP breakdown. Call us and we’ll be glad to help.
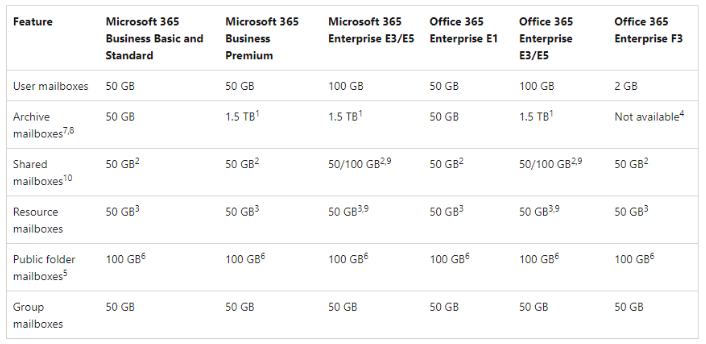
When we sign-up and first use Office 365, Exchange Online, and other MS Office 365 products we get in, start working and are usually unaware that there is a limited amount of storage. That’s because these services are cloud-based and Microsoft limits the maximum amount of storage based on the type of license you have.
You can refer to the below image to know the storage limit based on the mailbox type and license.
Shared mailboxes do not require licenses until their mailbox size exceeds 50 GB. To increase the mailbox size from 50 GB to 100 GB, you must assign an Exchange Online Plan 2 license.
So, how do I check how much space I have, and make more available space?
Besides upgrading your MS Office 365 plan (which can get costly), you can use the guides below based on the ways you use Outlook for your email.
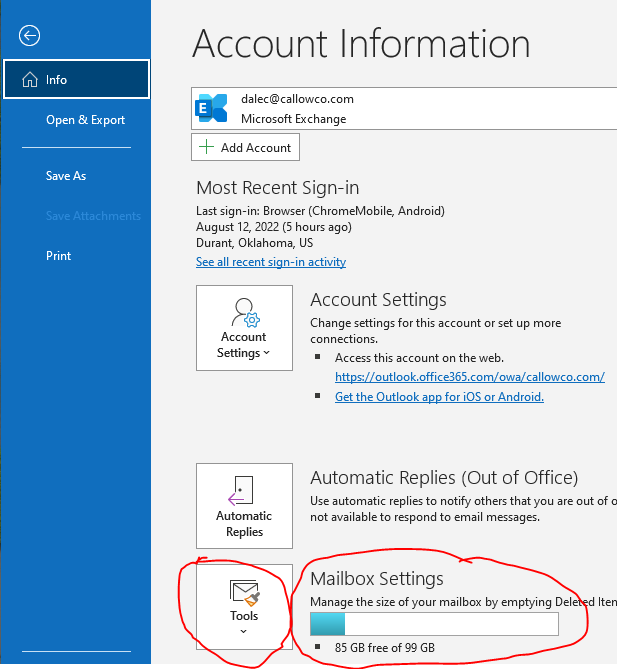
Using Outlook Desktop to check and clear free space
With Outlook desktop open, select the file menu:
Next, locate this area on the ‘File’ page:
This will show you how much free space you have, using the “Tools” button will give you options on freeing up space.
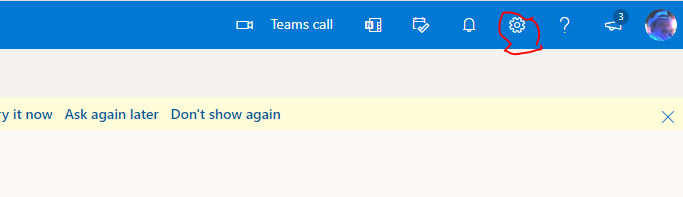
Using Outlook online to check and free up space
After you’ve logged in to your Exchange Online account and have it open, select the gear icon in the upper right corner:
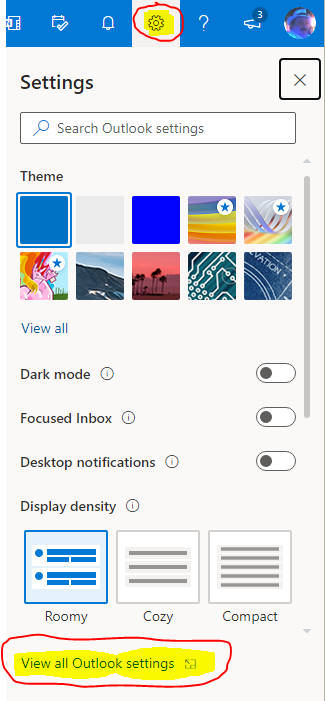
After you have selected the “Gear” icon a fly-out menu will be displayed, select “View All Outlook Settings”:
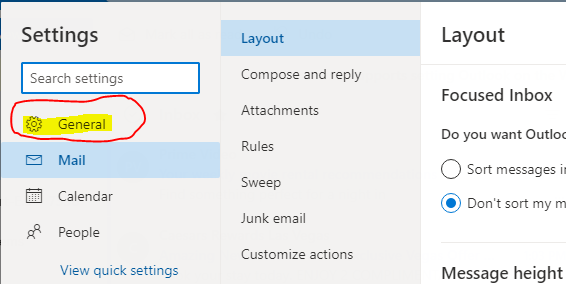
That will open the complete page of settings, select the “General” link:
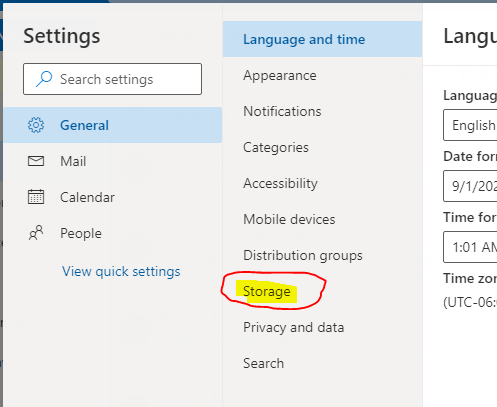
When the General settings are shown, select “Storage”:
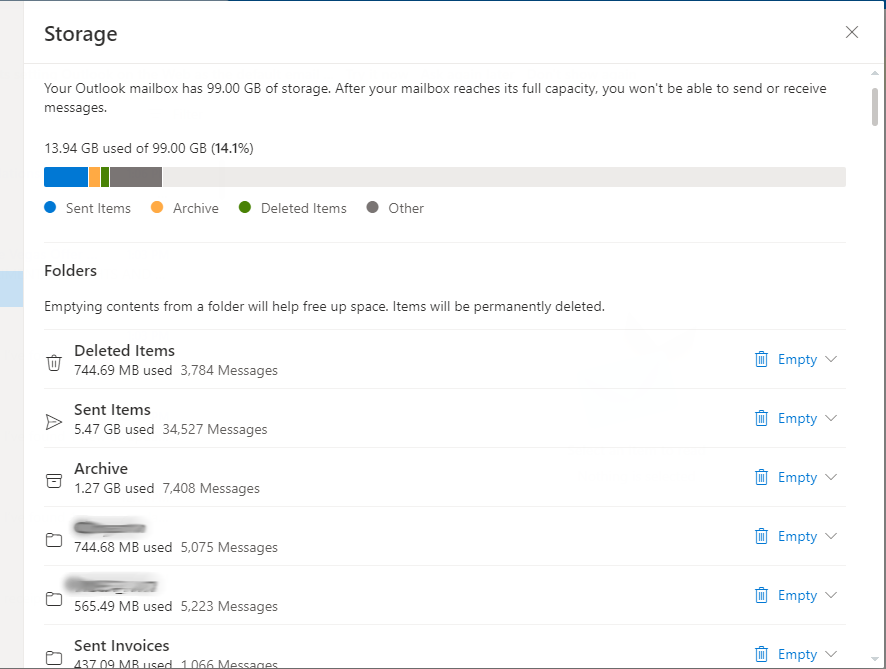
On the “Storage” page you will see your storage usage and have selections to free up available storage:
Last word about quota and storage
Quota and checking free storage space is not a daily task, but knowing about it and knowing ways to manage it will prevent you from receiving errors and being unable to send and receive until you clear some space.
If you need help with your IT needs or have a question drop me a line, or hire me. Call 972.571.4808 I’m happy to help.