
Disclaimer: I’m not fluent with the Linux operating system, I’ve always been a Windows user and this is to help others in the same boat. I realize this might not be as much of an issue for someone with more Linux experience.
Back Story
I’ve been upgrading my data center servers a little at a time since last month and was trying out Proxmox coming from VirtualBox on a Windows server. After a few upgrades, I decided to use Hyper-V. For the most part, because I’ve never had to work with Linux and I felt if something goes wrong I’m not going to be able to troubleshoot the problem quickly. So, I searched for ways to export the virtual computers from Proxmox, surprisingly I picked up pieces of information here and there but there really wasn’t a definitive guide, so here goes.
Step 1 – Create a Backup in Proxmox you can work with:
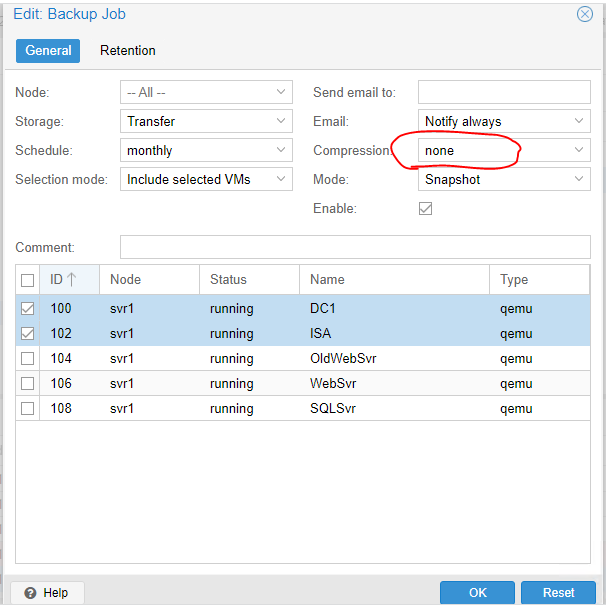
What I did was create a backup without any compression (so I wouldn’t have the extra step of decompressing the file first). The screenshot is just showing the first two VMs since I was testing my method. I’m creating the backups on a ‘Directory’ storage I created for that purpose that I called ‘Transfer’, the schedule doesn’t matter since I’m only doing this to export the images, once I do that I’ll remove the backup job.
Step 2 – Connect to the Proxmox server with an SSH tool
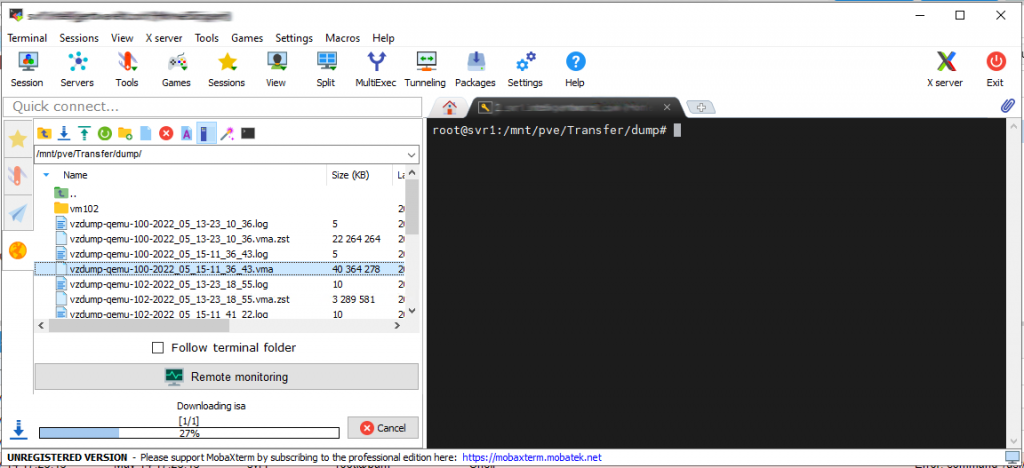
I used MobaXterm (Available Here) you could probably use any SSH program
Step 3 – Get the RAW image from the VMA file
There are several backup images in this location, but the image we want has the .vma extension (highlighted in the picture above). The first thing we want to do is get the raw image out of the vma image. We will run this utility to get the RAW image:
vma extract vzdump-qemu-100-2022_05_15-11_36_43.vma -v ./vm100
This tells the vma image to extract to a new folder named vm100 and to verify the image extracted. When it finishes when we navigate to the new folder we’ll see:
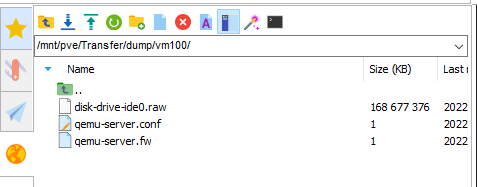
Step 4 – Convert the RAW image to a virtual disk image
Now we have the RAW image that we need to convert to a new virtual hard drive image that we can work with on our Windows Server. For that we need to use the Qemi tools and convert the image:
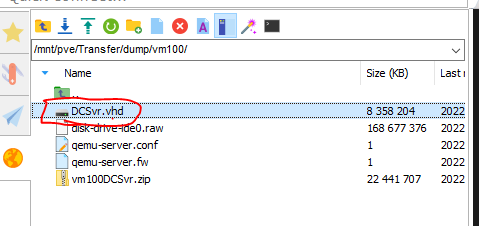
qemu-img convert -f raw -O vpc disk-drive-ide0.raw dcsvr.vhd
This utility will convert the image from a RAW format to the VHD format. After it’s converted to the vhd format we can ‘drag and drop’ the file to our Windows computer. If your windows computer isn’t local, you would want to use a USB drive since the image may be large.
Final thoughts
There are a lot of features that I like with Proxmox and if I didn’t have some mission-critical applications and customer replication requirements from their Hyper-V servers I would seriously consider keeping Proxmox on the server for managing my virtual machines. Sure, there’s a learning curve with any new software, but I just can’t take an unnecessary risk of downtime.
UPDATE 8/2024
I was doing some recent conversions from vmdk to vhdx both were on my Windows machine. With some searching, I found a QEMU tool available for Windows. I thought anyone reading this article might want more information on it. Here’s the link: https://cloudbase.it/qemu-img-windows/